
This easy royal icing recipe is made with meringue powder and is perfect for decorating sugar cookies. It dries smooth and firm enough to stack, but still has a soft texture when you bite into it. If you’re new to royal icing, this is a great place to start - just three ingredients and no raw eggs.
I used to avoid royal icing because it seemed complicated, but it’s surprisingly simple. Just three ingredients, and once you try it, you’ll wonder why you waited. You can adjust the consistency to outline, flood, or add fine details, all with one simple base recipe.
This recipe was updated in 2025 to include more tips on how to use royal icing and answers to common icing questions. It’s a long post, so stick with me if you’re looking for a thorough guide to royal icing basics.
Easy royal icing that tastes great and dries hard. Perfect for sugar cookies!
Makes 3 cups of icing
This website contains affiliate links to Amazon. This means that I may make a small commission if you purchase a product using these links. This is no way affects my opinion of these products. Links are provided to share products I have used when making this recipe.
Below you will find tips and tricks to help achieve the best results possible!
If you are seeing this post anywhere besides vosshomebakery.com then it's stolen content. Please consider visiting my official website and contact me if you see this recipe posted elsewhere.
Powdered Sugar – Make sure to sift the powdered sugar first. Clumps will make your icing harder to pipe and decorate with. Powdered sugar is also labeled as confectioners’ sugar.
Meringue Powder – This helps stabilize the icing and keeps it from cracking as it dries. It’s a substitute for raw egg whites and is easier and safer to use. You can find it at craft stores or online.

Stand mixer or hand mixer – I suggest using a stand mixer if you have one because this recipe requires a longer mixing time.
Whisk attachment for stand mixer
Hand whisk
Measuring spoons
Start the stand mixer at a low speed. Otherwise, you will have powdered sugar all over your countertop!
Scrape down the sides of the bowl and the bottom of the mixer to make sure any dry powdered sugar is incorporated.

Add extract: You can easily flavor royal icing by adding extracts. Peppermint extract is great during the holidays, but be careful not to make it too strong. Other good options include almond, orange, and lemon. Start by adding ½ teaspoon at a time until you reach the flavor you like.
Add spices: Spices also work well, but may change the color or leave tiny specks in the icing. I’ve added cinnamon, vanilla bean paste, and pumpkin pie spice before. As with extracts, start with a small amount and add more as needed.
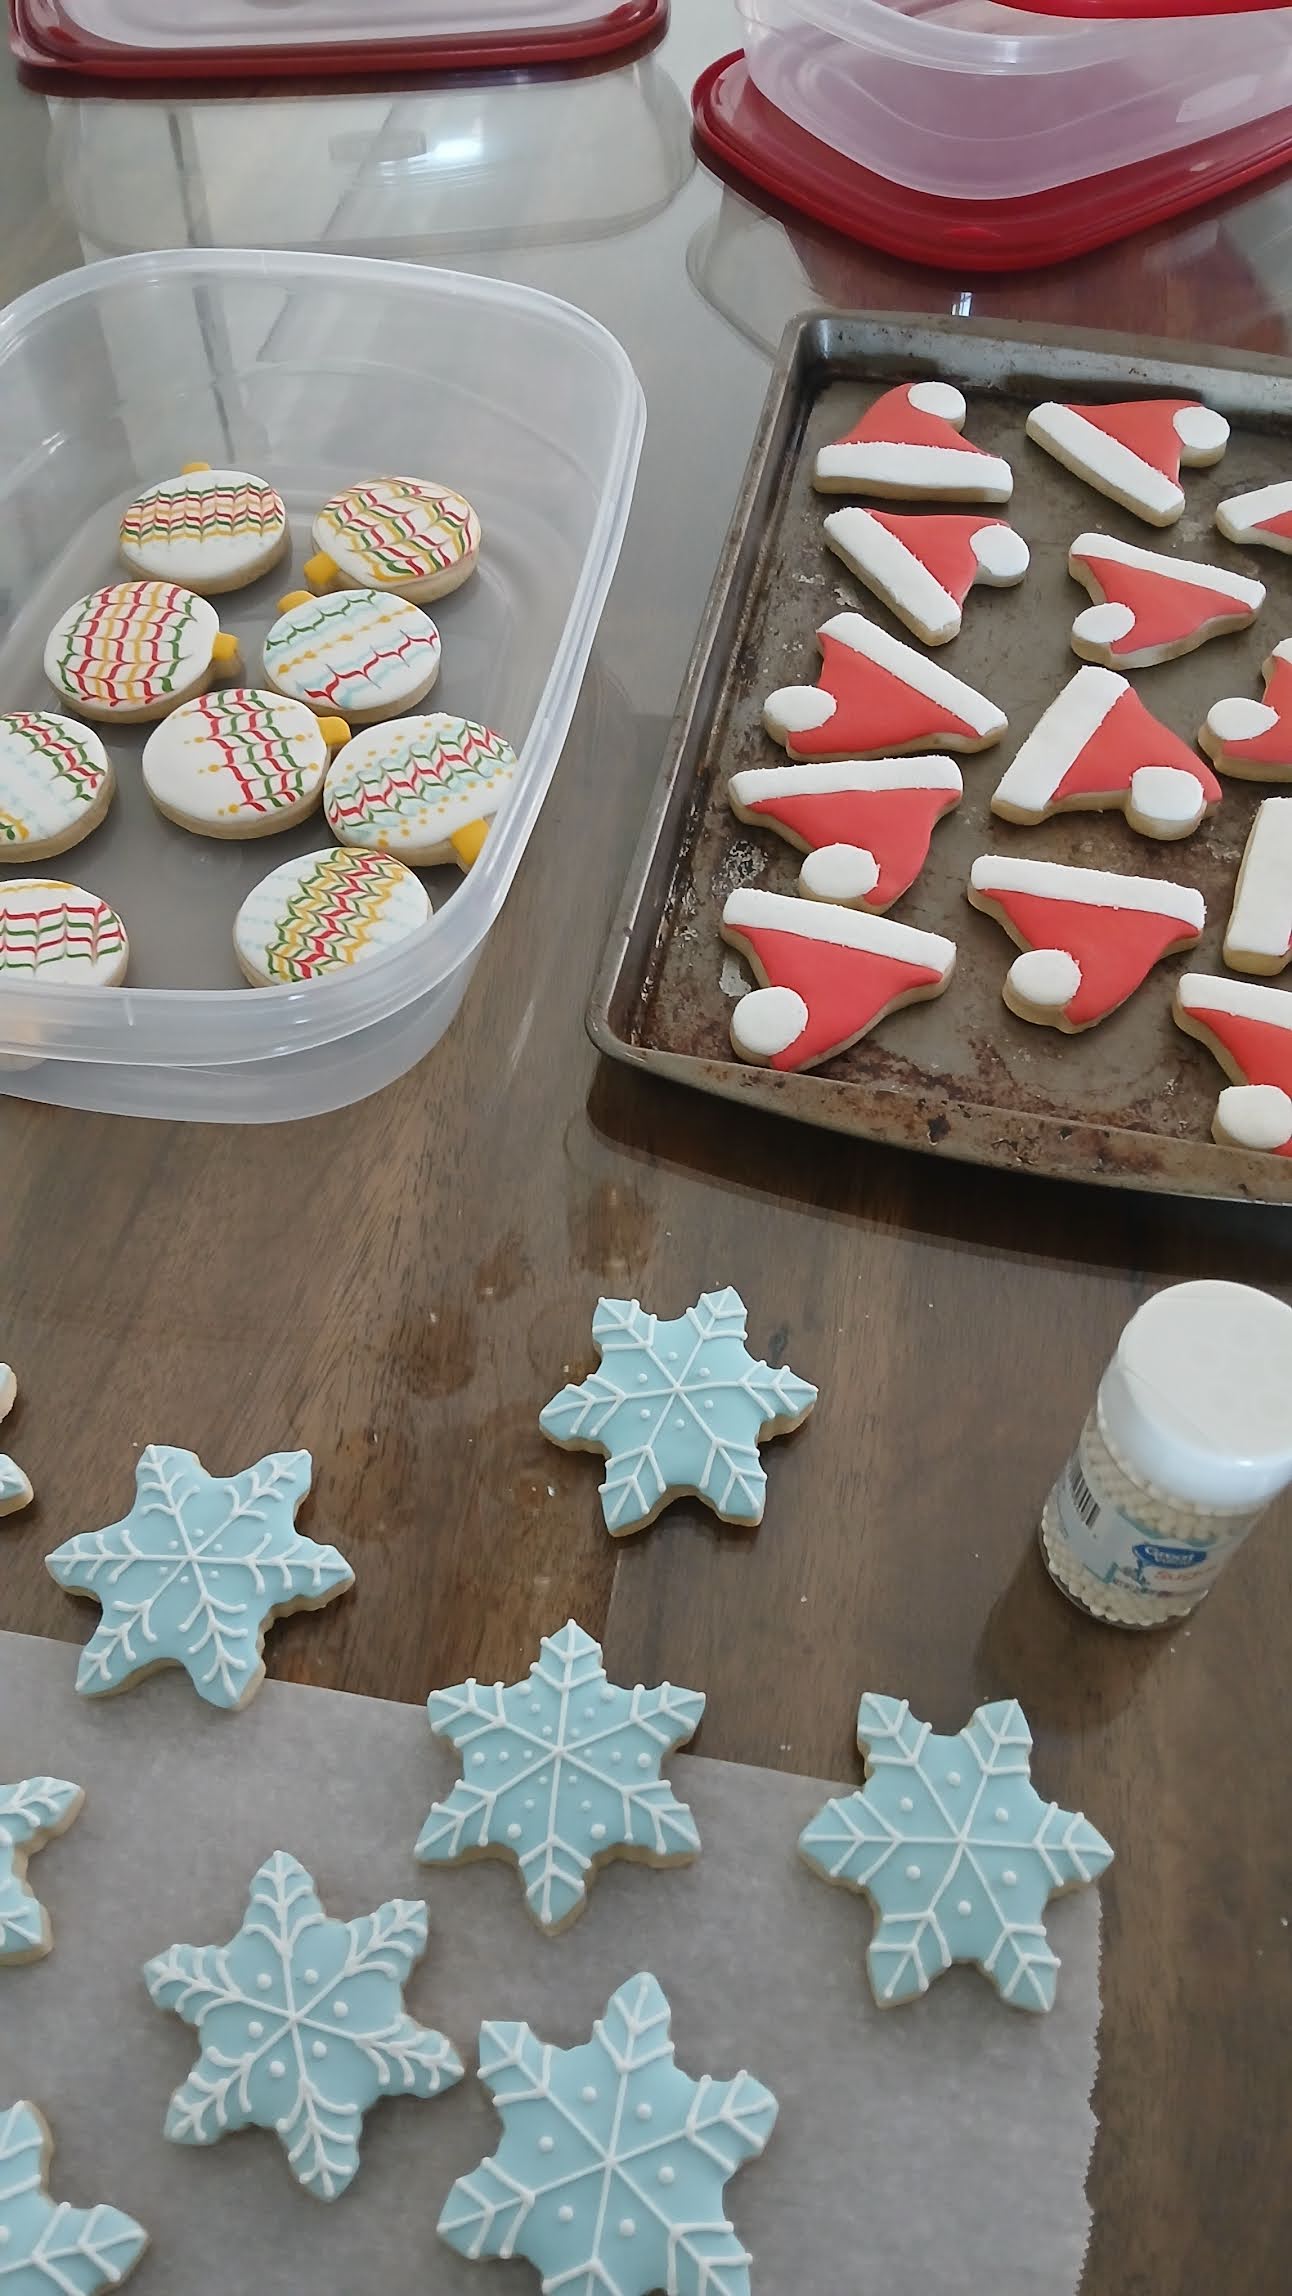
This icing works well for outlining, flooding, and adding decorative details on sugar cookies. After mixing, divide the icing into smaller bowls and thin each one with water as needed:
Some bakers follow the “icing seconds” rule - how many seconds it takes for a line to disappear when you drag a knife or spoon through the icing. For example, 5-second icing is thinner than 10-second icing. You’ll need to experiment to find the consistency that works best for you and the decorating method you prefer.
I usually like a 10 to 15-second icing, which has the texture of thick pancake batter. It is thin, but doesn’t run off a spoon too quickly. That’s just personal preference. Some bakers dip their cookies into icing for the base coat, which might require a different consistency. If you're new to this, I recommend watching a few videos and practicing. A lot of the success comes down to getting the consistency right that day.
Personally, I don’t make separate consistencies for outlining and flooding. I use one medium consistency for most of my cookies and only thicken the icing when I need to pipe lettering or fine details.
Use piping bags or squeeze bottles to decorate. Let cookies dry completely before stacking or packaging.
This is the process I usually follow when decorating sugar cookies with royal icing. Everyone’s routine is a little different, so feel free to adjust what works for you.
I usually work on one or two designs at a time. I’m a slow decorator, and limiting the number of colors and styles helps keep it manageable. Then I repeat the process for the next batch of designs.
Royal icing can be stored in an airtight container in the refrigerator for up to 7 days. The longer you store royal icing, the more you will see that the icing will begin to separate. Stir together before using. I often make my icing one day ahead of time so it is ready to use when I want to start decorating cookies.
Yes, traditional royal icing is made with raw egg whites instead of meringue powder. However, using meringue powder is safer and more convenient since it doesn’t require separating eggs and reduces food safety concerns.
It depends on the humidity and thickness of the icing, but the base layer usually needs to dry at least 6–8 hours or overnight. Details and added layers may require additional drying time before packaging.
Store it in an airtight container in the refrigerator for up to 7 days. The icing may separate over time; therefore, make sure to stir it well before using it again.
Too runny? Add more sifted powdered sugar a little at a time.
Too stiff? Add water a few drops at a time until it loosens up. Be patient, as small adjustments make a big difference.
Yes! Use gel food coloring for best results. Gel colors are concentrated and won’t thin out the icing like liquid food coloring can.
Eventually, yes. Stored properly in the fridge, it lasts about a week. If it smells off or develops any unusual texture, it’s best to make a fresh batch.
Yes, you can freeze royal icing. Store it in an airtight container and thaw it in the refrigerator overnight. Let it come to room temperature and stir well before using.
Looking for another frosting option? Check out my Cream Cheese Frosting recipe. It's rich, smooth, and perfect for cakes, cupcakes, or sandwiching between cookies.